Choosing Battlefields in Riftbound: Blind, Going First and Going Second
In Riftbound, choosing your battlefields is a strategic decision that many players underestimate, yet it can win a series before the first turn is even played. This guide explains how to select them deliberately; if the basics are not yet clear to you, start with how to play Riftbound.
Three battlefields for a best-of-three match
For a best of three match (abbreviated BO3) you bring three battlefields. Each one serves a specific purpose depending on the game state in which you will use it.
- Blind pick: the Game 1 battlefield, chosen before you know whether you will play first or second.
- Going First: the one you use when you act first in the following games.
- Going Second: the one you use when you act second.
The blind battlefield (Game 1)
In the first game you do not yet know the turn order, so you need a balanced, unflashy battlefield.
- It should subtly support your strategy without being so attractive that the opponent commits everything to it.
- It offers minimal benefit to the opponent if they end up controlling it.
- It is playable both on attack and on defence.
Classic example: Dusk Rose Lab is an excellent blind pick because it draws in favour of "sprite-heavy" decks but offers minimal value to anyone else.
The Going First battlefield
When you are the aggressor you want the greatest possible edge: this is your "weapon" battlefield.
- It rewards aggression and punishes passive play from the opponent.
- You play it only when the board is on your side from the very first turn.
Example: Grove of the God-Willow should be used going first only, because it offers draw that snowballs; playing it blind or going second would hand that draw engine to your opponent.
The Going Second battlefield
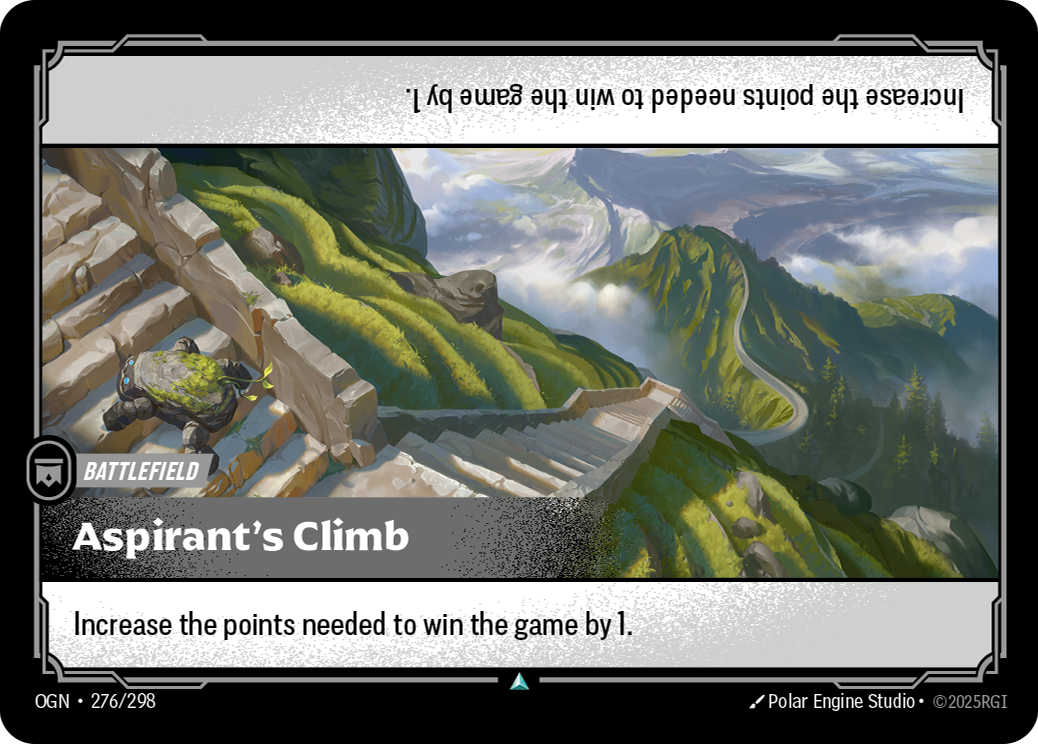
 Going FirstGrove of the God-Willow — snowball drawGoing SecondAspirant's Climb — raises the win to 9 points
When you play second, choose a battlefield you are happy to never hold: a genuine "throwaway".
- Its hold effect should be weak or irrelevant to the opponent.
- It must not be necessary to your win condition: losing it does not change your plan.
Example: Aspirant's Climb is ideal going second because it raises the win condition from 8 to 9 points, typically buying you an extra turn. To understand why that turn matters so much, see the victory conditions of Riftbound.
Coordinating battlefields with the side deck
Battlefield choice does not live in isolation: it interweaves with your between-games adaptation plan. Planning which fields to play in which game state is part of the same logic with which you manage the side deck in Riftbound, and with which you weigh tempo versus value in every game.
The framework is a starting point, not a script
The blind / first / second triad gives you a reliable structure, but it is not a rigid screenplay.
- Matchup knowledge changes everything: after Game 1 you know far more.
- Adapt your choices based on the legend and the archetype you have recognised in your opponent.
- A "throwaway" battlefield can become valuable if you discover the opponent cannot exploit it.
Summary
Choose a balanced blind pick for Game 1, an aggressive battlefield for when you go first, and a harmless throwaway for when you go second, then adapt everything to your matchup knowledge. It is a decision played before the cards are. To consolidate the game's fundamentals, continue with how to play Riftbound.
Test yourself
Question 1How many battlefields do you bring for a best-of-three (BO3) match?
Question 2What is the 'blind pick' battlefield?
Question 3What feature should a good blind battlefield have?
Question 4Which battlefield is cited as a classic blind pick example?
Question 5How is the Going First battlefield described?
Question 6Why should Grove of the God-Willow be used going first only?
Question 7What kind of battlefield should you pick going second?
Question 8Why is Aspirant's Climb ideal going second?
Question 9According to the guide, what changes everything after Game 1?
Question 10What can happen to a 'throwaway' battlefield according to the guide?
Comments
Log in to comment.